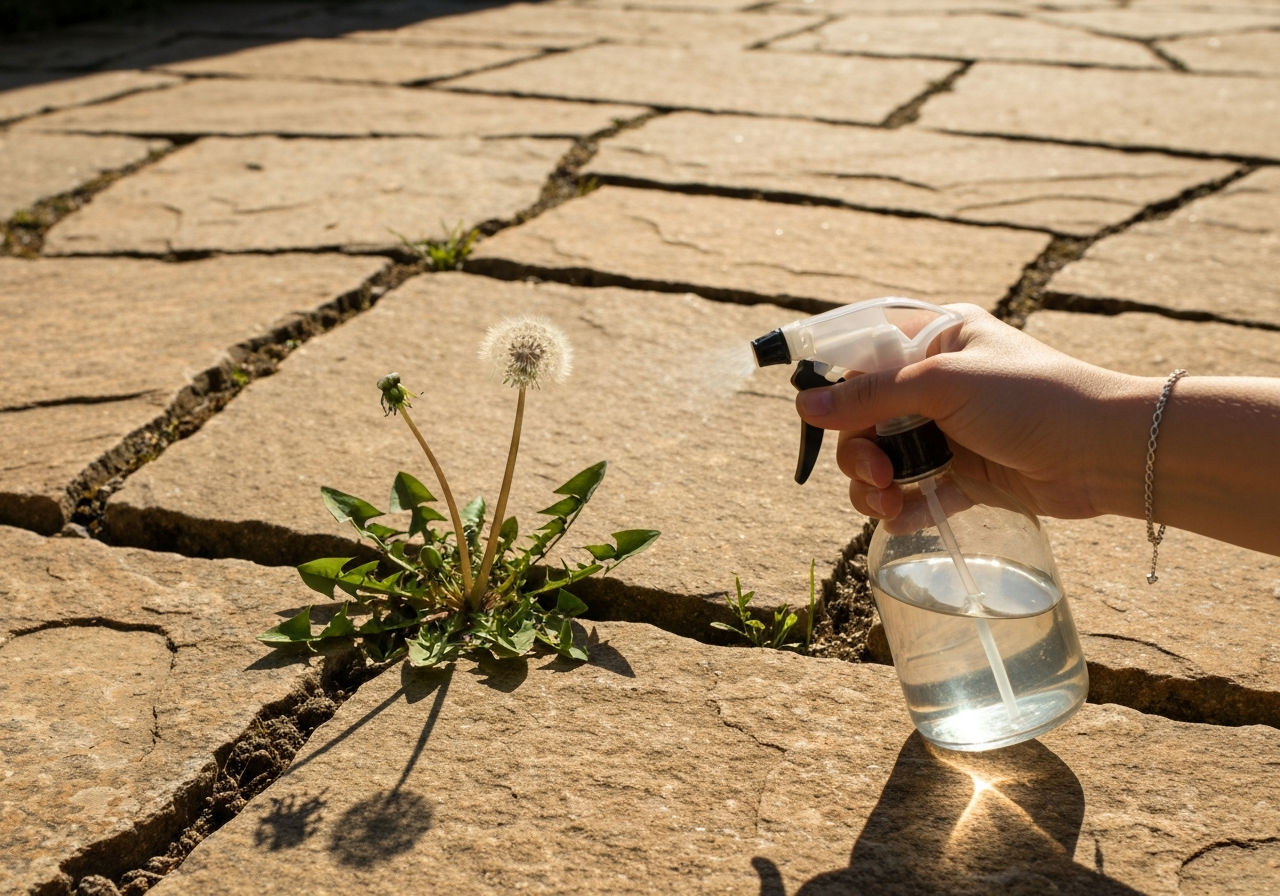
There’s a certain kind of satisfaction that comes with having a clean, tidy outdoor space, even if it’s just a small patio or balcony. It’s your little slice of nature. But then, they appear. Those stubborn, resilient weeds forcing their way through the tiniest cracks in the concrete or between your paving stones. As a renter, your options can feel limited. You can’t exactly go out and buy a flamethrower (as tempting as it might be!), and dousing your space in harsh, chemical-laden herbicides feels like the exact opposite of the eco-conscious life you’re trying to live. Not to mention the worry about pets, kids, or local wildlife. The good news? You don’t have to choose between a weedy patio and a chemical cocktail. Your kitchen cupboard holds the secret to a powerful, effective, and incredibly cheap DIY natural weed killer that’s perfect for the unique challenges of renting. Let’s get mixing! Why Ditch Commercial Weed Killers? Before we dive into the recipe, it’s worth a quick reminder of why we’re doing this. Many common commercial weed killers contain ingredients like glyphosate, which has been linked to negative impacts on everything from bee populations to aquatic life when it runs off into waterways. For a renter, the concerns are even more immediate: Safety: Do you really want unknown chemicals lingering where your pet sniffs, your child plays, or you walk barefoot? Cost: Specialized products can be expensive, and for a few pesky weeds, it’s often overkill. Storage: Who has space in a small apartment for a big jug of toxic liquid? This DIY solution bypasses all those issues. It’s made from simple ingredients you likely already own, it’s non-toxic to people and pets once dry, and you can mix up just enough for the job at hand. The Ultimate 3-Ingredient Renter-Friendly Weed Killer This recipe is a classic for a reason: it works. It’s a non-selective herbicide, meaning it will damage any plant it touches, which is why it’s absolutely perfect for targeting weeds in isolated spots like patio cracks, driveway edges, or between pavers where you don’t want anything growing. What You’ll Need: 1 Gallon of White Vinegar (5% acidity is fine): The acetic acid in vinegar is the star player. It works by drawing moisture out of the plant’s leaves, causing them to dry up and die. 1 Cup of Salt (Table salt or Epsom salt works): Salt acts as a desiccant and makes it harder for the weed to absorb water. It can impact soil long-term, which is why we only use it in cracks where we don’t want future growth. 1 Tablespoon of Liquid Dish Soap: This is the secret weapon! The soap acts as a surfactant, breaking down the waxy surface of the weed’s leaves. This allows the vinegar and salt solution to stick to the plant and be absorbed more effectively, rather than just beading up and rolling off. A Spray Bottle: Any old, clean spray bottle will do. The Super-Simple Recipe & Instructions: Pour the white vinegar into your spray bottle. If you’re not making a full gallon, just adjust the ratios (e.g., 4 cups of vinegar, 1/4 cup of salt, and about a teaspoon of soap). Add the salt and the dish soap to the bottle. Put the lid on tight and shake gently until the salt is fully dissolved. You don’t want to create too many suds! That’s it! You’re ready to go. Pro Tips for Maximum Weed-Zapping Power To get the best results from your homemade weed killer, a little strategy goes a long way. Tip 1: Wait for a Sunny Day Apply your solution on a hot, dry, sunny day with minimal wind. The sun helps accelerate the dehydration process, and you’ll often see weeds begin to wilt within hours. Applying it before rain will just wash it all away. Tip 2: Target Your Application Remember, this spray is non-selective. Get close to the weed and thoroughly saturate its leaves. Be careful not to overspray onto your lawn or any nearby container plants you actually want to keep! Tip 3: For Extra-Tough Weeds, Use Boiling Water First Got a particularly stubborn weed that just won’t quit? Carefully pour a kettle of boiling water directly onto it. This will scald the plant and shock its system. Wait for it to dry, and then follow up with your vinegar spray for a one-two punch. Tip 4: Be Patient and Persistent This natural solution kills the top growth of the weed effectively. For weeds with deep taproots, you may need a second application a week or two later to fully finish the job. The key is persistence! Tackling those annoying patio weeds doesn’t require harsh chemicals or a big budget. With just a few simple ingredients and a spray bottle, you can reclaim your outdoor space in a way that’s safe, smart, and perfectly suited to the eco-friendly renter’s lifestyle. Happy spraying!
DIY Natural Weed Killer: Banish Patio Weeds the Renter-Friendly Way