
Apartment living shouldn’t mean giving up on your composting dreams. Even in the smallest of spaces, you can harness the power of worms to transform your kitchen scraps into nutrient-rich gold for your plants. And the best part? A well-maintained worm bin doesn’t have to smell! This guide will walk you through building a simple, odor-free vermicomposting system perfect for renters.
Why Vermicompost in a Small Space?
Vermicomposting, or composting with worms, is an incredibly efficient way to reduce your household waste. It’s much faster than traditional composting and takes up far less space. Plus, the resulting “worm castings” are a fantastic, natural fertilizer for your houseplants or that small balcony garden you’ve been nurturing.
Benefits of Vermicomposting:
- Reduces landfill waste
- Creates nutrient-rich fertilizer
- Requires minimal space
- Quiet and odorless (when done right!)
Building Your Odor-Free Worm Bin
This setup utilizes readily available plastic bins, making it both affordable and adaptable to various space constraints. Here’s what you’ll need:
Materials:
- Two opaque plastic storage bins (one slightly smaller than the other)
- Drill with 1/4″ drill bit
- Bedding materials (shredded newspaper, coconut coir, peat moss)
- Red wiggler worms (Eisenia fetida)
- A piece of brick or plastic lid
Instructions:
Step 1: Preparing the Bins: Drill drainage holes in the bottom of the smaller bin and ventilation holes in the lid of the larger bin. The smaller bin will nest inside the larger one, creating a reservoir for excess liquid (worm tea!).
Step 2: Creating the Bedding: Soak the bedding materials in water and then squeeze out the excess. The bedding should be damp, like a wrung-out sponge. This provides the perfect environment for your worms.
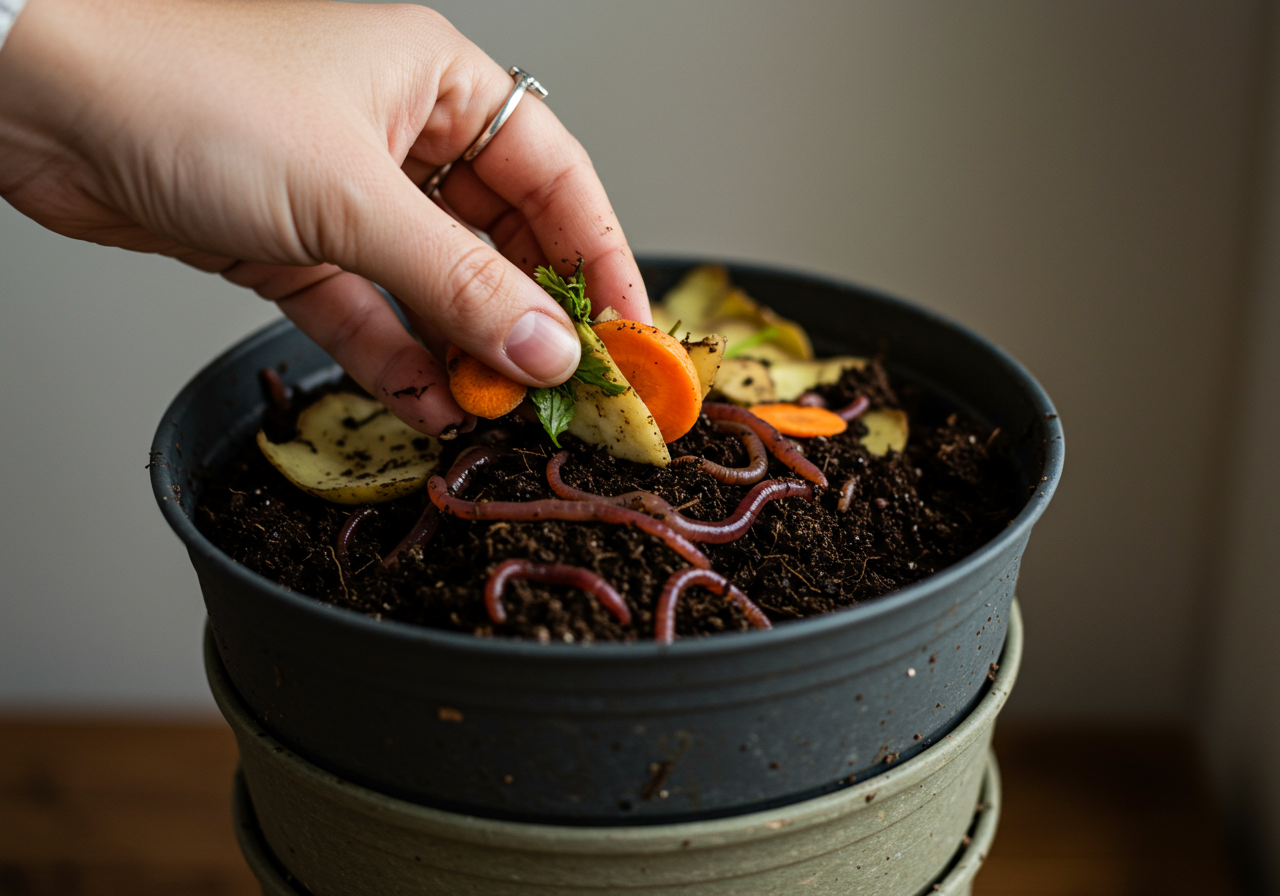
Step 3: Introducing the Worms: Place the damp bedding into the smaller bin. Add your red wiggler worms. You can usually purchase these online or at a local garden center.
Step 4: Nesting and Covering: Place the smaller bin inside the larger one. Place the brick or plastic lid inside the smaller bin to create a convenient feeding platform. Cover the larger bin with its lid to retain moisture and prevent fruit flies.
Maintaining Your Worm Bin (and Keeping it Odor-Free!)
The key to an odor-free worm bin is balance. Here’s how to achieve it:
Feeding Your Worms:
- What to Feed: Fruit and vegetable scraps, coffee grounds and filters, tea bags (remove staples), crushed eggshells.
- What to Avoid: Meat, dairy, oily foods, citrus fruits, onions, garlic.
- How Much to Feed: Start small and observe how quickly your worms consume the food. Add more once they’ve finished the previous batch. Bury food scraps under a shallow layer of bedding to prevent odors.
Managing Moisture:
Too Wet: If the bin is too wet, add more dry bedding material. Ensure adequate drainage.
Too Dry: Mist the bedding with water if it feels too dry. Remember, it should be like a wrung-out sponge.
Harvesting Worm Castings:
After a few months, you’ll have a rich supply of worm castings! There are various methods for harvesting, but a simple one is to move all the compost to one side of the bin and add fresh bedding to the other. The worms will gradually migrate to the fresh bedding, leaving the castings behind for you to collect.
Vermicomposting is a rewarding journey, and even in a small space, you can make a big difference. By following these steps and paying attention to your worm bin’s needs, you can enjoy the benefits of composting without the worry of unpleasant smells. Happy worming!


I enjoyed reading your piece and it provided me with a lot of value. http://www.kayswell.com
Thank you for being of assistance to me. I really loved this article. http://www.kayswell.com
Great content! Super high-quality! Keep it up! http://www.kayswell.com