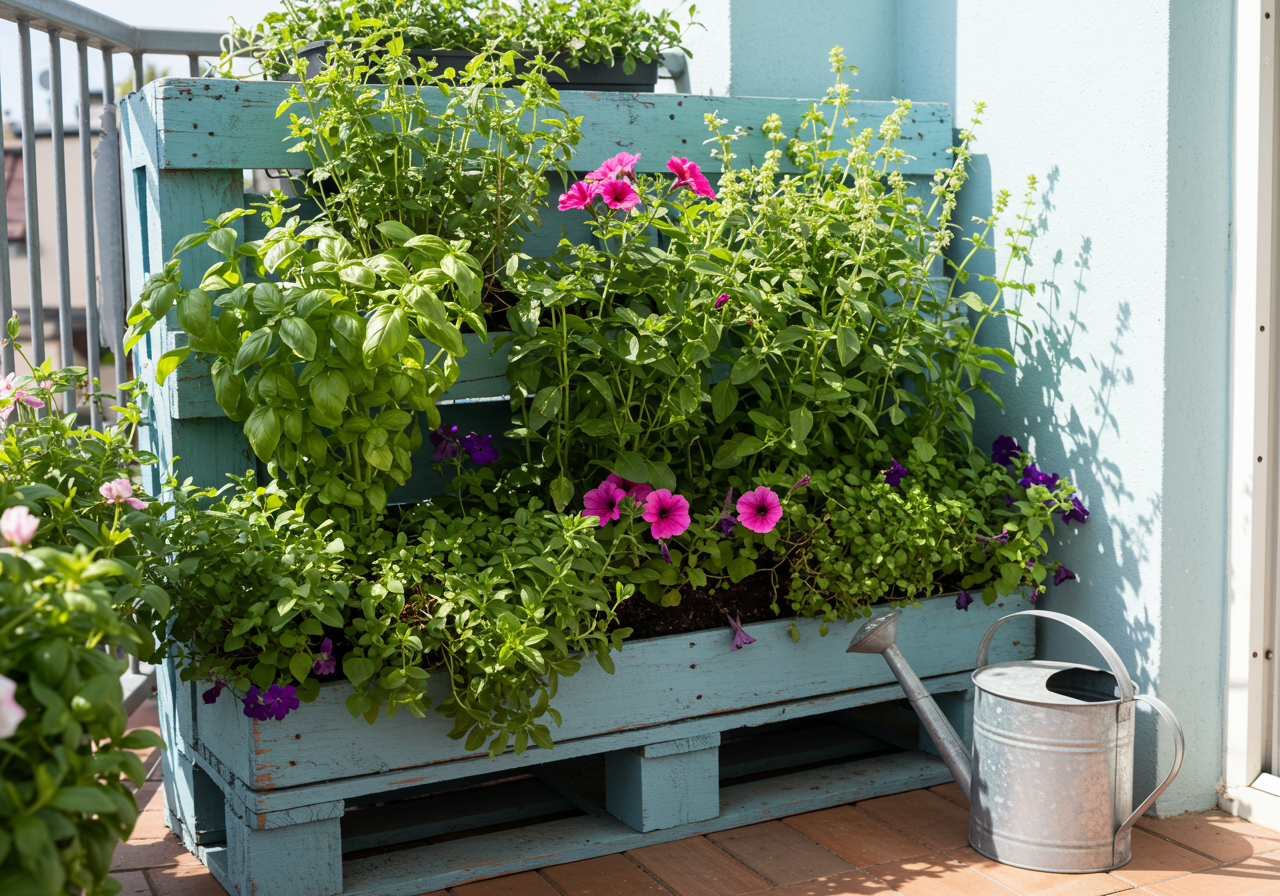
Renting shouldn’t mean sacrificing your green thumb! Limited balcony space? No problem! A vertical pallet garden is the perfect solution for eco-conscious renters craving fresh herbs, vibrant flowers, or even a small veggie patch. This project is budget-friendly, customizable, and best of all, requires no permanent installations. So, let’s get growing!
Why a Vertical Pallet Garden?
Vertical gardens are space-saving wonders, maximizing your limited square footage. Repurposing a pallet adds a rustic charm while offering a ready-made structure for your plants. Plus, it’s a fantastic way to upcycle and reduce waste!
Benefits of a Pallet Garden:
- Space-saving: Ideal for small balconies and patios.
- Affordable: Pallets are often free or low-cost.
- Easy to build: Minimal DIY skills required.
- Customizable: Adapt the size and layout to your needs.
- Eco-friendly: Repurposes existing materials.
Gathering Your Supplies
Before you begin, gather these essential supplies:
- A pallet: Choose a sturdy, untreated pallet. Check for an “HT” stamp (heat-treated) to ensure it’s safe for growing food. Avoid painted or chemically treated pallets.
- Heavy-duty landscape fabric: This will create pockets to hold your soil.
- Staple gun and staples: For securing the landscape fabric.
- Safety gloves and goggles: Protect your hands and eyes while working.
- Potting mix: Choose a high-quality mix suitable for your chosen plants.
- Your favorite plants or seedlings: Herbs, flowers, or small vegetables work well.
- Optional: Sandpaper to smooth rough edges, waterproof sealant for added protection.
Building Your Vertical Garden
Building your pallet garden is easier than you think. Follow these simple steps:
Step 1: Prep Your Pallet
Clean the pallet thoroughly with a brush and soapy water. Sand down any rough edges or splinters. Optionally, apply a waterproof sealant for longevity.
Step 2: Create the Planting Pockets
Cut the landscape fabric into sections large enough to create pockets between the pallet slats. Staple the fabric along the sides and bottom of each section, forming a trough to hold the soil. Ensure the staples are securely fastened.
Step 3: Fill with Potting Mix
Carefully fill the fabric pockets with potting mix. Don’t overfill, as this can make watering difficult. Leave some space at the top for easy watering.
Step 4: Plant Your Green Goodies
Gently plant your chosen seedlings or plants into the potting mix. Space them appropriately, considering their mature size.
Step 5: Secure and Enjoy
Lean the pallet against your balcony wall or railing, ensuring it’s secure and won’t tip over. Water your plants thoroughly and enjoy watching your vertical garden flourish!
Tips for Success
Here are a few extra tips to ensure your vertical pallet garden thrives:
- Watering: Water regularly, especially during hot weather. Consider a drip irrigation system for easier maintenance.
- Sunlight: Choose plants suited to your balcony’s sunlight exposure.
- Fertilizing: Feed your plants regularly with a balanced liquid fertilizer.
- Pest control: Monitor for pests and take appropriate action, opting for natural methods whenever possible.
With a little creativity and effort, you can transform your small balcony into a thriving green oasis. Happy gardening!