Living green doesn’t have to mean owning your own home. Even as a renter, you have the power to reduce your environmental impact and lower your utility bills through simple changes. One of the most effective ways to achieve this is by performing a DIY home energy audit. Don’t worry, it’s easier than it sounds! This step-by-step guide will empower you to assess your rental’s energy efficiency and identify areas for improvement, all without any major renovations.
Getting Started: Gather Your Tools
Before you begin, collect these essential tools:
- Sticky notes or masking tape and a pen: For labeling drafts and air leaks.
- A hairdryer (optional): To help detect air leaks.
- A thermometer: To check for temperature variations.
- A timer: To track how long hot water runs.
- Your utility bills (optional): To analyze your energy consumption patterns.
Step 1: The Visual Inspection
Start by carefully examining your rental for obvious signs of energy waste. This is a simple walkthrough that can reveal a surprising amount of information.
Windows and Doors:
Check for gaps and cracks around window frames and doors. Feel for drafts, especially on colder days. You can use the hairdryer on a cool setting to help detect subtle air leaks. Mark any problem areas with sticky notes.
Walls and Ceilings:
Look for any visible cracks or gaps in the walls and ceilings, particularly where different materials meet. These can be significant sources of heat loss.
Electrical Outlets and Light Fixtures:
Check outlets and light fixtures, especially those on exterior walls, for drafts. While sealing these yourself might not be permitted, noting them can be useful later when communicating with your landlord.
Step 2: Testing the Hot Water
Inefficient hot water usage can contribute significantly to energy waste. Time how long it takes for hot water to reach your kitchen and bathroom sinks. If it takes longer than 15 seconds, you may have heat loss in the pipes. Consider using low-flow showerheads and faucet aerators (if allowed by your lease) to conserve water and energy.
Step 3: Appliance Check
While replacing appliances likely isn’t an option in a rental, you can still assess their efficiency. Look for Energy Star labels on existing appliances. Ensure your refrigerator and freezer doors seal properly. Clean the refrigerator coils regularly to maintain optimal performance.
Step 4: Lighting Assessment
Evaluate the types of light bulbs used in your rental. Switch to LED bulbs where possible – they use significantly less energy and last much longer than traditional incandescent bulbs. Remember to follow your lease agreement regarding any changes to fixtures.
Step 5: Analyze Your Findings and Take Action
Once you’ve completed your audit, review your findings. Prioritize the areas where you can make the most impact. Some solutions you can implement yourself include:
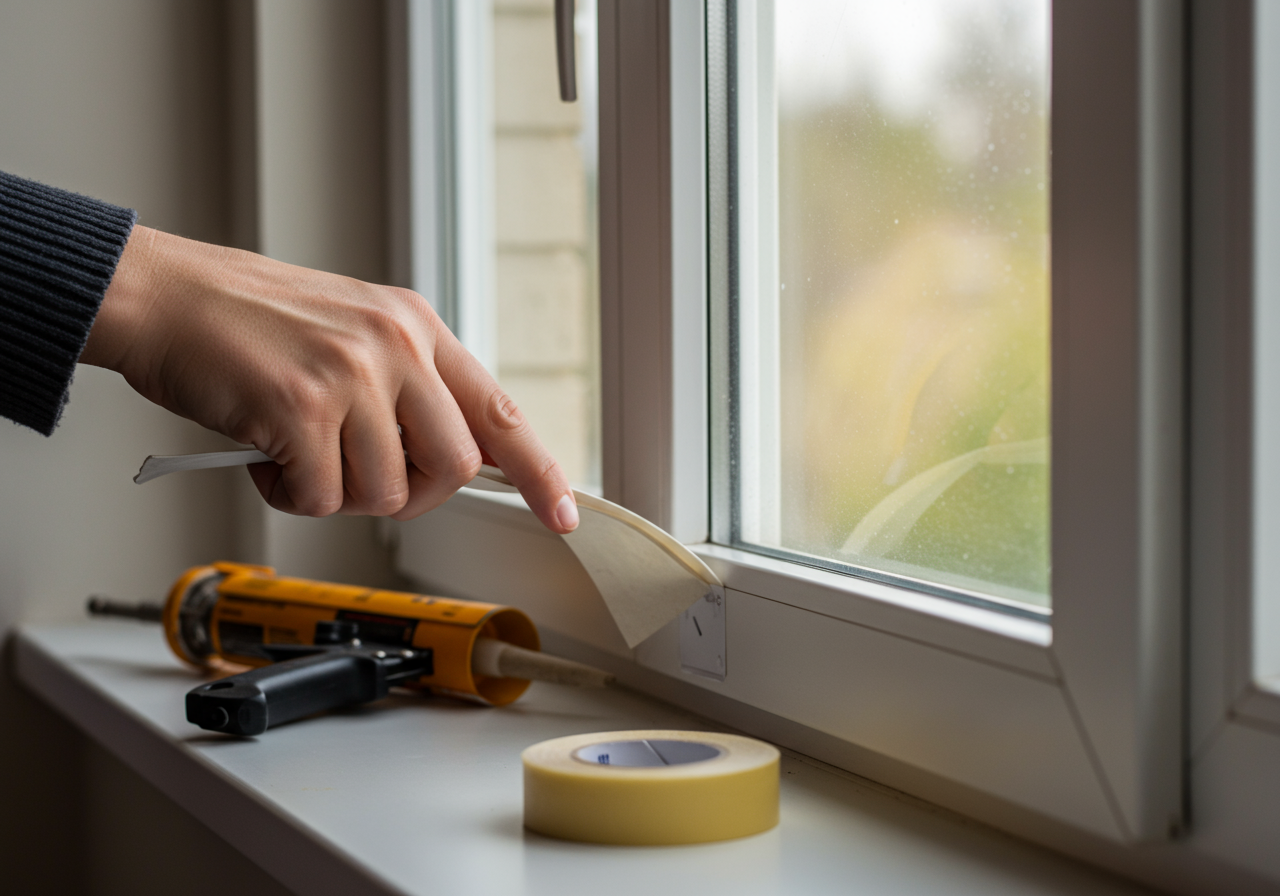
- Apply weatherstripping: Seal gaps around windows and doors with weatherstripping tape or caulk (after getting permission from your landlord).
- Use window coverings: Curtains or blinds can help insulate your windows and reduce heat loss.
- Unplug electronics: Reduce phantom loads by unplugging chargers and electronics when not in use or using a power strip.
- Be mindful of heating and cooling: Adjust your thermostat to conserve energy when you’re away or asleep.
Communicating with Your Landlord
If you’ve identified issues that require landlord involvement, such as significant drafts or insulation problems, communicate your findings respectfully and constructively. Provide a clear and concise list of the areas you’ve identified, along with potential solutions. Remember, you and your landlord share a common goal – a comfortable and energy-efficient living space.
Performing a DIY home energy audit empowers you to take control of your energy consumption and create a greener, more cost-effective living space. Even small changes can make a big difference, both for your wallet and the environment.