Renting shouldn’t mean sacrificing style or sustainability. One of the biggest challenges renters face is limited storage and the inability to make permanent changes. But what if you could create beautiful, functional shelving without damaging your walls? Enter the world of modular, damage-free shelving built from reclaimed wood – a perfect blend of eco-consciousness and renter-friendly design.
Why Reclaimed Wood?
Choosing reclaimed wood isn’t just trendy; it’s a powerful way to minimize your environmental footprint. By giving old wood a new life, you’re reducing demand for newly harvested timber, preventing deforestation, and keeping perfectly usable materials out of landfills. Plus, reclaimed wood boasts unique character, adding a touch of rustic charm to any space.
Sourcing Your Reclaimed Wood
Finding reclaimed wood is easier than you think! Check out these local sources:
- Demolition sites: Contact local demolition companies – they often have a surplus of wood they’re willing to part with.
- Architectural salvage yards: These treasure troves offer a curated selection of reclaimed wood with varying ages and finishes.
- Online marketplaces: Websites like Craigslist and Facebook Marketplace can be great resources for finding reclaimed wood from individuals.
- Local woodworkers: Often, woodworkers have leftover pieces from projects, which can be perfect for smaller shelving units.
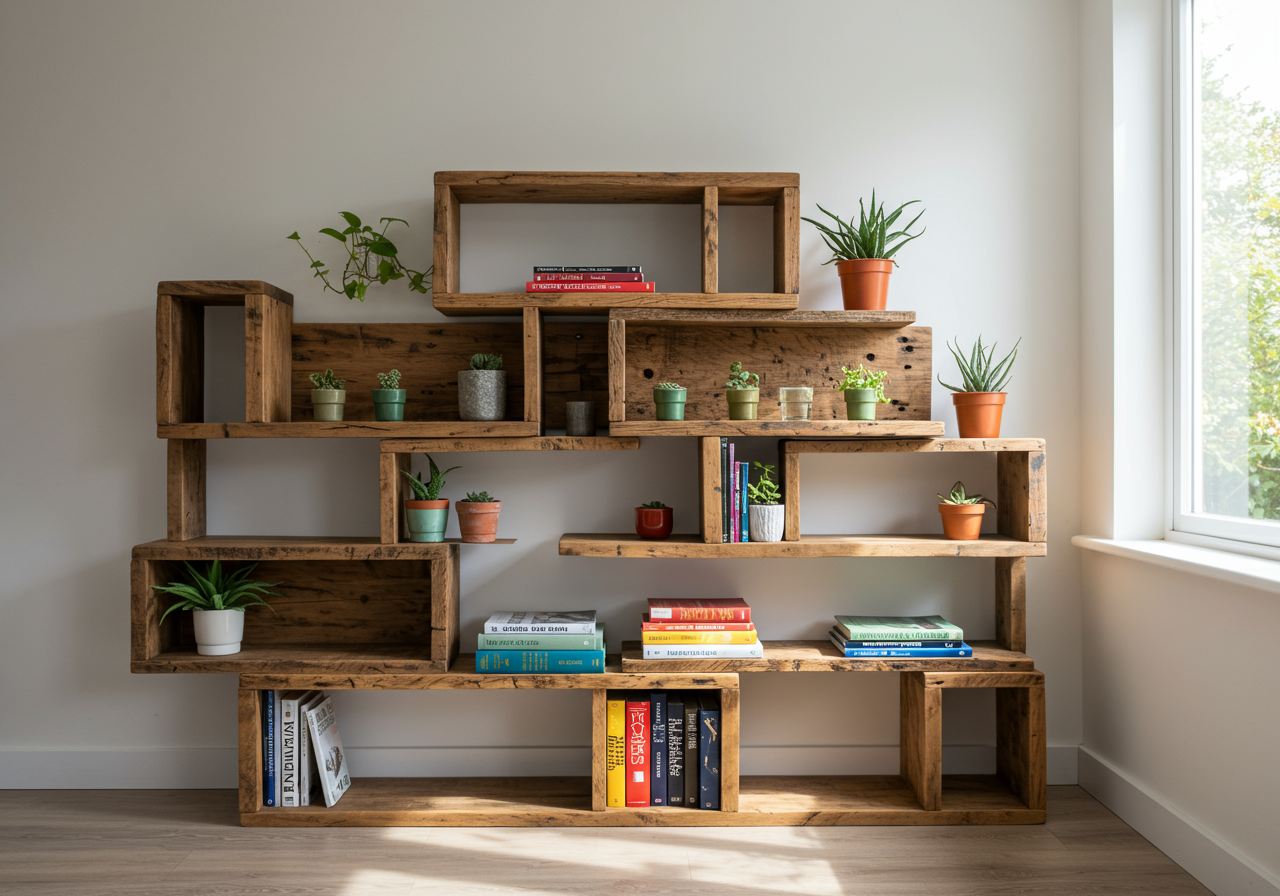
Building Your Modular System
The key to damage-free shelving is modularity. Instead of one large, wall-mounted unit, create several smaller, freestanding shelves that can be easily rearranged or moved. This approach offers flexibility and protects your security deposit.
Materials You’ll Need:
- Reclaimed wood planks (cut to your desired shelf sizes)
- Sturdy brackets (choose styles that complement the wood)
- Sandpaper (various grits)
- Wood stain or sealant (optional, for added protection and aesthetics)
- Screws and a screwdriver (or a drill)
- Level
- Measuring tape
Putting it Together:
- Prep the wood: Sand down any rough edges or splinters. If desired, apply a stain or sealant and let it dry completely.
- Attach the brackets: Position the brackets on the underside of the shelves, ensuring they’re evenly spaced. Secure them with screws.
- Stack and arrange: The beauty of this system is its adaptability. Stack the shelves to create a vertical unit, or arrange them individually for a staggered look.
Creative & Practical Ideas:
Don’t limit yourself to simple shelves! Get creative with your modular system:
- Create a vertical garden: Use smaller shelves to display potted plants, creating a living wall feature.
- Build a modular desk: Combine larger shelves with sturdy legs to form a versatile desk that can be easily disassembled.
- Design a custom bookcase: Arrange shelves of varying lengths and depths to create a unique and visually appealing bookcase.
Damage-Free Mounting Options:
While freestanding shelves are ideal, you might want to mount some pieces for added stability or to utilize vertical space. Consider these renter-friendly mounting options:
- Adhesive strips: These are perfect for lighter shelves and can be easily removed without damaging the walls.
- Tension rods: Use tension rods between floor and ceiling to create a framework for hanging shelves.
- Picture rails: Install a removable picture rail and hang shelves from it using hooks or wire.
Building your own modular shelving from reclaimed wood is a rewarding project that combines sustainability, style, and practicality. It’s a perfect example of how renters can create a personalized, eco-conscious space without compromising their lease agreement. So, get creative, reclaim some wood, and start building!